I have been struggling with Ikea duvet covers since I bought my first duvet (or comforter... I don't care too much about the technical differences between the two products... and I prefer the word comforter... so from now on I will call it comforter :) ).
I absolutely LOVE the fact that the cover and the comforter are two different pieces and that I can use the same covers that I like, with a super warm "filling" in the winter and a lighter filling in spring/summer. However I absolutely HATE to put on the comforter covers!! :) and I just have a twin size bed... I wouldn't even try to deal with bigger sizes... I know people that got lost inside a comforter cover trying to "match the corners"... they were found years later, disoriented and scared, whispering things like "I couldn't find my way out" :) :) ok, just kidding... however I still don't like the fact that the covers are designed the way they are... moreover they are a nightmare (for me) to iron too... and not to mention the everyday battle in the morning to try to make the bed when the (evil) corners that I matched the first time I put the cover on decide to roll into the middle of the cover while I was sleeping!! O_O that's it! It's too much to handle!
...
So I start thinking... what is exactly the problem of those covers? the problem is very simple... it is that the top part and the bottom part are connected by seams... and when I realized that, something clicked in my mind... actually something snapped in my mind :)
...
Why can't I simply split the two sides apart and then connect them with some snap fasteners?? Easy said, easy done!! :) I will put some pictures of the final result once I finish it (I didn't have enough snap fasteners so I just used them on the two long sides, I miss the two short ones, however I tried it already and it works perfectly on my bed!!); but now let me list the looong list of pros that this solution has :)
- it makes the change of the cover super easy!! No matching of corners ever again!! I simply lay down on the floor (or directly on the bed) the bottom side of the comforter cover. I lay on top of that the comforter (that fits perfectly inside because that was its cover!). I lay on top of that, the top side of the comforter cover. I snap all the snaps fasteners closed. That's it!! Everything is in place without shaking, pulling, pushing, matching, etc.
- if the corners move around during the night, I simply put my hand in the hole between the snap fasteners (or I open one or two of them), I grab the corner and put it back in place. That's it!!
- it makes the ironing soooo much easier, because now they are just single layers of flat pieces of fabric... much easier to handle than two layers connected!!
- it makes the room much more dynamic... because I can change the top cover how many times I want... even every day,leaving the bottom part the same... I can just follow my heart and my mood :)... I just have to put the snaps on covers with different design and that's it!
- it make the washing and drying much easier because you can wash separately the two parts... if they have different designs/colors that can be important... and it is essential for the final (and actually the most important) pro that I have
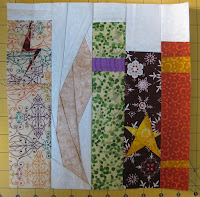
- I started to design and put together paper piecing quilts (soon I hope to be able to share here my designs), but I want to build something that I will use... and as I said before I love my comforters and I cannot sleep with anything else... so now that I split the two parts of the comforter covers I can just put together my quilt as a normal quilt, add the snap fasteners around the border and bom! I can use my custom quilt as a comforter top on my bed!! :)
I will soon update this post with pictures of my work... but if in the meantime someone wants to try that, I will be happy to hear from your experience on that :) so add comments below for any questions/suggestion/advice!
P.S. If you don't want to separate completely the two pieces of fabric, you can open the 3 sides that have the seam and leave the top attached. In this way the cover will still be intact but more manageable IMHO :)
P.P.S. I just built one of this covers for now... so I don't exactly know which is the optimal distance between the snap fasteners... it also depends from your "sleeping style" because the further apart the fasteners are, the more likely the comforter will "peek" from the cover. However for me 5 on the long side were enough to keep the comforter inside, but maybe more fasteners closer to the corner would be better... will see :)
P.P.P.S. In my experience, it is not good to rip the two sides completely apart and then put the snap fasteners on try to align those two big pieces of fabric. A better way to do it is to open the seam, segment by segment, add one snap fastener and then continue open it. Doing this along the whole perimeter of the cover would make the alignment much easier.


